Standing Seam Metal Roofing
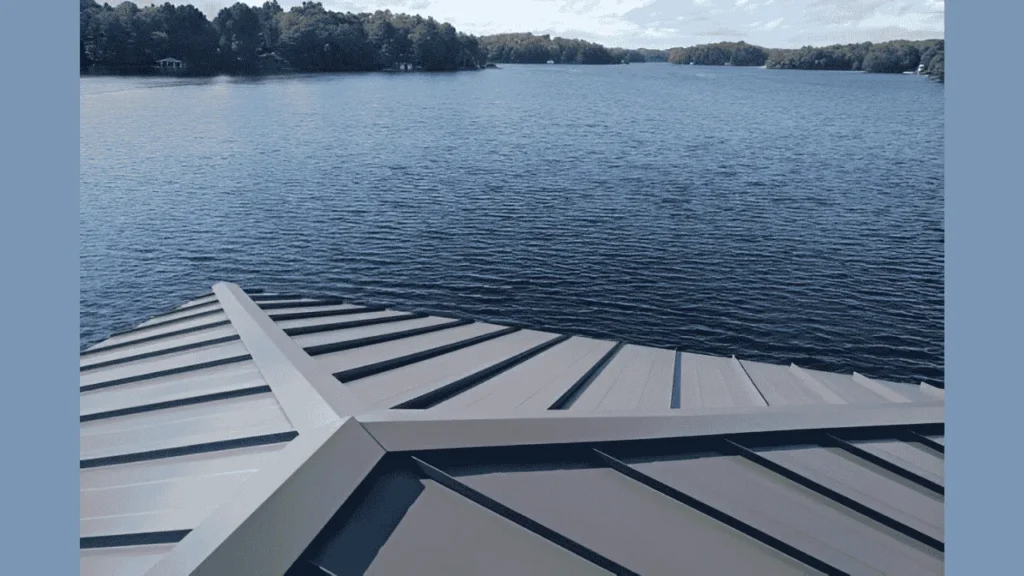
Standing seam metal roofing is a high-quality roofing system commonly used in the United States. It is made from metal panels that are joined together using raised vertical seams. These seams act like folds that securely connect one metal panel to another. Their unique design allows the panels to lock together tightly without any visible screws or fasteners on the surface.
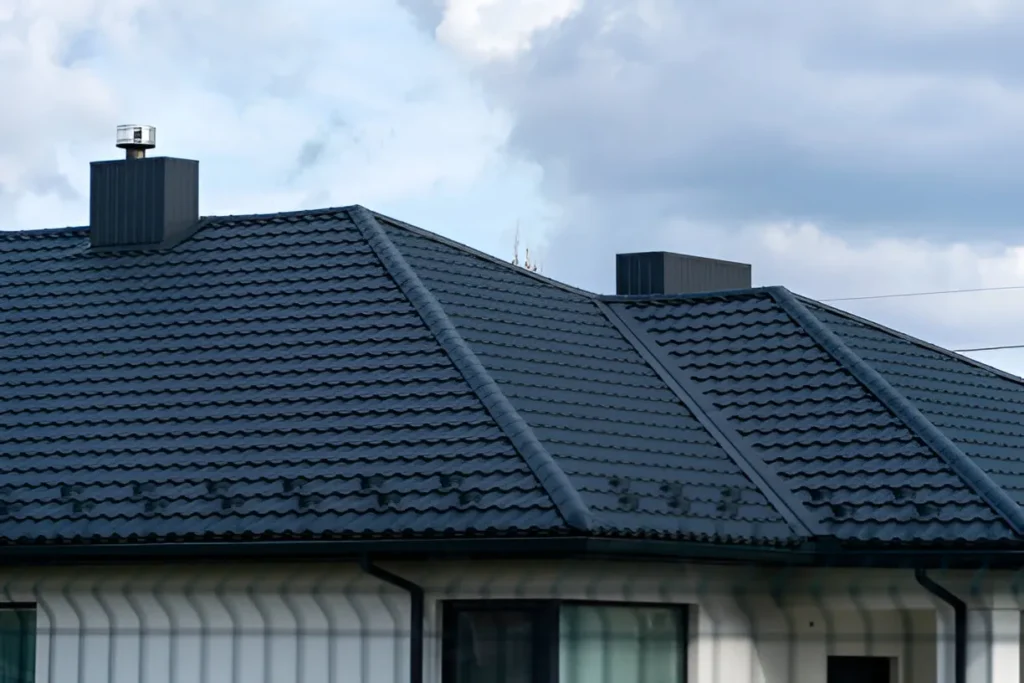
The term “standing seam” comes from the way the seams stand vertically above the flat surface of the roof panels. These seams are aligned in a straight line, running from the top of the roof to the bottom. They also cover the edges of the roof, creating a beautiful, clean, and modern design. And that’s it!
How Standing Seam Metal Roof Works
Each metal panel in a standing seam roofing system is carefully designed with raised vertical edges, also known as legs, on both sides. These legs are engineered to fit precisely with adjacent panels, allowing a tight and secure connection between them. This interlocking design increases the strength and performance of the roof.
The seams between the panels are either snapped together manually or locked mechanically using special seaming tools, which enhance their grip and stability. One of the most important features of this system is that all the fasteners are completely hidden beneath the seams, never exposed on the surface. This concealed fastening method plays a crucial role in protecting the roof from water infiltration, UV rays, rust, and other environmental damage, making it far more durable than traditional screw-down metal roofs.
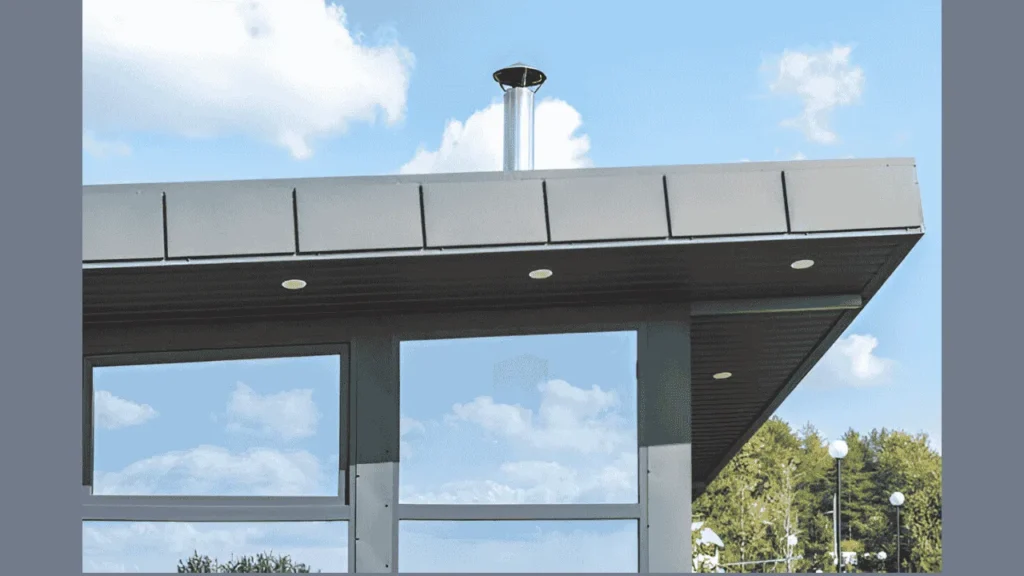
In addition to its structural benefits, this concealed-seam design gives the roof a sleek, clean, and modern appearance, with no visible screws or hardware breaking the surface. The result is a roofing system that offers superior protection against harsh weather while also enhancing the building’s curb appeal with its smooth, continuous lines and architectural elegance.
Standing Seam Metal Roof Assembly
The Standing Seam Metal Roof assembly is really simple, and here is the step-by-step process. It requires precise planning to ensure a seamless, watertight, and long-lasting finish. Below is the complete process given for assembling a standing seam metal roof.
1. Roof Deck Preparation
The first step is roof deck preparation. First, ensure the roof surface is simple, clean, dry, and structurally sound. Check that the structure is solid and well-built. Then, inspect the recommended decking materials — these should be plywood, OSB, or a metal substrate. After that, apply the roof underlayment across the entire surface of the roof, with an overlap of at least 6 inches.

2. Install Eave Trim and Drip Edge
The next step is installing the eave trim and drip edge on the standing seam metal roof. To do this, position the eave trim along the edges of the roof, and ensure that you attach it using proper screws or nails. Make sure the overlaps are neat and properly sealed. Then, install the drip edge and flashing to guide water off the roof and into the gutters, ensuring proper water flow, lapping, and drainage.
3. Attach Starter Clips or Cleats
The next and most important step—which many people get wrong—is to secure the starter clips at the eave, where the first panel will be attached. Make sure all clips are perfectly aligned using a chalk line or a similar tool. These clips must be leveled and spaced properly according to the manufacturer’s recommendations. It’s strongly advised to have this process done by a professional or manufacturer-approved installer—don’t attempt it yourself, as incorrect installation can lead to safety issues and problems in the long run.
4. Panel Installation Begins
The next and most important step is panel installation. To do this, first position the first panel onto the starter clip and align it properly using a plumb line. Then, engage the panel over the sheet and snap or lock it into place using a seaming tool (or thumb tool).
Next, secure the panel using sliding metal clips at each leg of the panel. Please make sure to avoid walking directly on the panel surface during installation to prevent damage. Always fix the clips to the substrate, not the panel itself—this is the best and safest method for installing any roofing panels.
5. Continue Panel Placement
The next step is panel placement. Place the new panel by overlapping its leg with the leg of the previous seam. Start all panels in a parallel order. For a snap-lock system, press the panel until it properly clicks into place.
For mechanical seam roofing, use a seaming tool to crimp or lock the panels together. This step is highly technical, and many people do it incorrectly. Repeat this process until the entire roof slope is completely covered with properly locked panels.
6. Panel Cutting and Trimming
The next and most important step is panel cutting and trimming. Trim the panel at the top and bottom as needed, according to the metal roof layout. Use caution to avoid damaging the panel finish and surface.
Always leave space for thermal expansion due to heat and temperature changes. This step is critical to prevent issues like panel warping or buckling over time.

7. Install Ridge Cap and Z-Closures
After installing all the panels in place, the next step is to install the ridge cap and closure at the ridge for support and proper airflow control. Apply butyl tape or another sealant below the ridge cap to prevent any water penetration or leakage.
Set the ridge cap over the closures and secure it using hidden fasteners or clips to maintain a clean finish and ensure long-lasting protection.
8. Sidewall and Endwall Flashing
The next step is side wall and end wall flashing. Install the side wall flashing where the roof meets vertical walls, chimneys, or dormers. Use proper counter flashing and sealant to ensure complete waterproofing.
The end wall flashing is installed at the top of the standing seam panels where they meet a vertical wall. This step is extremely important for preventing leaks and ensuring a watertight seal at wall intersections.
9. Finishing Details
The next step is panel finishing and detailing. To do this, install the gable trim or cap flashing along the exposed panel edges. Apply sealant or butyl tape wherever necessary for extra protection.
Carefully inspect all seams, fasteners, and edges to ensure proper alignment and tightness. This final detailing step is essential for ensuring a clean look, long-lasting performance, and leak prevention.
10. Final Inspection
The last but not the least step is to check all clips, flashings, and panel locks. This is the final inspection of the roof panels. Make sure everything is properly sealed, waterproof, and there is sufficient space for water flow.
Clean off any metal shavings, adjust any improper spots, and carefully inspect all areas to avoid any leaks or damage in the future. This final step ensures the roof’s durability, safety, and performance.
Cost of Standing Seam Metal Roofing in 2025
Hello, this is Abdullah, Vice President of Standing Seam Roofing, and welcome to Standing Seam Roofing. Today we are going to talk about how much standing seam metal roofing costs. This is the metal roofing website that brings you the Western States method. This is the best guide for metal roofing and includes a full list of materials.
In this guide, we are going to break down two things:
First, we will give you the materials-only price for standing seam metal roofing, and then we’ll provide a total cost estimate for the complete metal roofing installation.
Your upfront cost for a standing seam roof is about twice as much as an asphalt or corrugated roof. However, in the long run, a standing seam roof is actually much cheaper. If you’d like to learn more about that, check the description — we have a full video and article on the return on investment for standing seam metal roofs.
Materials Cost and Quality
When you buy a standing seam panel, you’re buying the best of the best. You have the best paint system, and you have a heavy gauge. There just aren’t a lot of variables. So generally speaking, you’re looking at somewhere between $2.25 to $3.75 per square foot for materials only. Not all standing seam installations are the same—some are more difficult than others. What makes a difficult installation? Anything where you have changes in elevation. Valleys are difficult, just an irregular-shaped roof. When you have roofs like that, it’ll cost more than a simple even gable roof.
According to the Metal Roofing Alliance, standing seam metal roofing will cost $8 to $12 per square foot, including materials and installation. So for example, let’s say you have a 2,000 square foot house, and let’s say it’s an easier install versus a harder install. So at $10 a square foot, it would be about $20,000 for a standing seam roof. As a rule of thumb, the labor cost of your total standing seam job is typically 60% to 70% of the overall cost. This is why it’s very important to get more than one bid.
Lifetime Roof Investment & Market Changes
So if you’re purchasing a standing seam roof, what you’ve got to remember is you’re purchasing a lifetime roof. You’re buying a panel that’s heavy gauge. You’re buying a panel with the best paint system. You’re buying a panel with concealed fasteners. You’re truly buying a panel that’s designed to last 40 to 60+ years. And if it’s installed right, it’s the last metal roof you’ll ever need to buy. You can find step-by-step installation videos and homeowner guides on our channel, and don’t forget to show your support by hitting the like button and subscribe.
The question we get asked every day is, how much does metal roofing cost? And previously, that’d be a pretty easy question to answer, but in today’s era of COVID, things have just changed so rapidly that it’s actually a more difficult question than it used to be. All the information that you see online hasn’t really been adjusted to reflect today’s current market conditions. So in this video, we’re going to talk about what a metal roof will cost in 2022 and all the factors that go into that. My name is Paul Rubio, one of the owners of Western States Metal Roofing, and I want to welcome you to the Metal Roofing Learning Channel.
Complete Price Breakdown and Additional Factors
Metal roofing prices had really been pretty stable for the past ten years until we hit COVID of 2021, and it just threw a monkey wrench in everything. The price of steel has actually substantially increased from 2021 and will go into 2022. So really the goal of this video is to give you a ballpark price of what a metal roof would cost if you’re at the beginning stages of researching your project. Once you get a little deeper into knowing what you want, we recommend that you actually reach out to a material supplier or a roofing contractor to get a more accurate price.
Here’s a short answer to a complicated question: the complete installed price of a standing seam roof will probably cost you about $10 to $16 per square foot installed. And an exposed fastener panel such as a corrugated or an R panel will probably cost you about $7 to $12 per square foot installed. So in this video, what we’re going to do is break down the materials cost of the metal roof, the accessories and trim, the labor cost, and a few other factors that will go into the total price of your metal roof.
Most standing seam jobs will be a 24-gauge thickness in a Kynar paint finish. A ballpark price on that will be $3 to $4 per square foot, really dependent upon the size of your job and the location of your job. A few important factors to consider: the first one would be the width of the panel. The normal width of the panel that we supply is 18 inches. That’ll be the most cost-effective panel. If the width starts to get narrower, your price will increase. One other consideration would be that this is for a normal standard Kynar color such as red, white, or brown, etc. We do have specialty paint prints which are designed to look like maybe a rusted steel or a copper or an old copper material. Those will increase your price by $1 to $1.25 per square foot.
Exposed fastener panels will cost significantly less than a standing seam panel. Generally, those panels are purchased one of two ways: either in a lighter gauge and an SMP paint finish, or they’ll be a heavier gauge and a Kynar paint finish. And if you need to know the difference between a higher quality Kynar paint versus SMP, we made a video about this and I suggest that you click the link above for a little more information on that. But as far as the pricing goes, a 24-gauge Kynar exposed fastener panel is going to run you $2.50 to $3.50 per square foot, and a 26-gauge panel in an SMP paint finish is going to run you about $1.75 to $2.50 per square foot. These are material-only prices for typical standard colors. Again, we offer specialty paint prints in exposed fastener panels also, such as Streaked Rust or Streaked Copper, which will add about $1 to $1.25 per square foot.
No two roofs are the same. Some roofs might require very minimal trim and flashings, while other roofs could be very complicated and have a whole lot of trim and flashings. So what we’re going to do here is just give you a general guideline of what to budget, and that’ll at least get you close. In addition, any metal roofing that’s going to sit on a solid wood substrate is going to require underlayment. So that’s your first expense—a nice synthetic underlayment. We recommend Sharkskin. Any nice synthetic underlayment’s a good idea. There are really two types: peel-and-stick and non-adhesive. Ballpark pricing: $0.20 to $0.25/sq.ft. for non-adhesive, and $0.55 to $0.65/sq.ft. for peel-and-stick.
If I was to give you a ballpark guesstimate on what the trim, flashing, and accessories would cost for a metal roof, a standing seam roof is going to require a lot more trim than an exposed fastener system. So for a standing seam roof, I would guesstimate that whatever the cost of your standing seam panels are, if you were to add an extra 30% to 40%, that’s probably a fairly good guesstimate. For an exposed fastener panel, that number would be closer to 20% to 25%. As an example, if you had $10,000 worth of standing seam panels, it’d be pretty realistic to figure that you need about an additional $3,500 worth of trim and accessories.
Labor Costs, Installation Difficulty & Final Thoughts
Not all installations are the same. Some are much more difficult than others. What makes a difficult installation? Changes in elevations, valleys, irregular shapes—all of these factors will increase the price compared to a simple roof with just eaves, gable, and ridge. The labor cost of a metal roof is typically about 60% to 70% of the overall budget. So we highly recommend that you get more than one bid, as it’s such a high percentage of the overall cost of the job. In addition, labor costs vary by region, and experienced installers charge a premium, due to a shortage of skilled installers. The labor cost of a standing seam metal roof is usually about 60% to 70% of the overall price, while an exposed fastener panel like a corrugated roof has lower labor costs due to easier installation.
Here’s the total price including materials and installation. Standing seam: $10 to $16/sq.ft. Example: 2,500 sq.ft. roof at $12 = $30,000. Exposed fastener panels: $7 to $12/sq.ft. Example: 2,500 sq.ft. roof at $9 = $22,500.
The goal of this video was to give you something current and relevant to the 2021–2022 steel shortage and price increases. This video is meant as a starting point to help you decide if a metal roof is right for you. Once you decide, it makes sense to reach out to a roofing contractor or supplier to get an accurate quote based on your roof difficulty, location, and other specifics. You can find more step-by-step guides and videos on our channel—don’t forget to like and subscribe. Want to learn more? Check out these videos. Bye.
| Cost Item | Estimated Price |
|---|---|
| Standing seam panels (materials only) | $2.25 – $3.75 per sq.ft. |
| Standing seam (materials + installation) | $8 – $12 per sq.ft. |
| Example: 2,000 sq.ft. standing seam roof | ~$20,000 |
| Installed price (standing seam) | $10 – $16 per sq.ft. |
| Installed price (exposed fastener panels) | $7 – $12 per sq.ft. |
| Exposed fastener panel (24-gauge Kynar) | $2.50 – $3.50 per sq.ft. (materials only) |
| Exposed fastener panel (26-gauge SMP) | $1.75 – $2.50 per sq.ft. (materials only) |
| Specialty paint upgrade | +$1.00 – $1.25 per sq.ft. |
| Synthetic underlayment (non-adhesive) | $0.20 – $0.25 per sq.ft. |
| Peel-and-stick underlayment | $0.55 – $0.65 per sq.ft. |
| Trim & accessories (standing seam) | 30% – 40% of panel cost |
| Trim & accessories (exposed fastener) | 20% – 25% of panel cost |
| Labor cost (standing seam) | 60% – 70% of total job cost |
| Example: 2,500 sq.ft. standing seam @ $12 | ~$30,000 |
| Example: 2,500 sq.ft. exposed fastener @ $9 | ~$22,500 |
Standing Seam Metal Roof Installation
Okay, installing a standing seam metal roof is not just about looks or just for show. It’s all about safety, speed, and long-term value. In this guide, we will take you through the real-life installation done by professionals, and explain the step-by-step process to install a standing seam metal roof, including all the products used, the installation steps, and the total cost from start to end. So keep going, stay with us, and take your first step in doing it right.
Why Hire Pros for Standing Seam Metal Roof Installation?
Okay, it can be tempting to try installing a standing seam metal roof yourself — but it’s always best when done by experienced professionals. In this case, the homeowner knew that climbing on a steep roof isn’t the safest option. The professionals completed the job super fast and did it the right way in very little time — something that could have taken a week or more without their help. Not to mention, the metal used was a higher gauge and better quality than what’s typically available at big box stores like Lowe’s or Menards.
Preparing for Installation
The next and most important step is preparing for the installation. Before the first panel was laid, the builder came out and measured all the sides of the roof. This is a very important step, including drainage requirements and all other necessary preparation details. The metal was then delivered a day before installation, and it came with all the extra trim pieces and custom-sized sheets.
The first step in the installation process was securing the roof edge flashing, which helps keep water from dripping off the ends. The panels were staged and ready to go.
Starting With the Panels
The roof consisted of two pitches: a 4/12 lower pitch and a 5/12 upper pitch. Installers began with the shorter side. They used pan-head screws with gaskets—these create a seal and prevent water leaks. The panels were overlapped by 2 inches on each edge to create a solid drip edge. Gutters weren’t used for this structure; instead, runoff would land on mulch or stone.
Installers marked the location of the rafters (2x4s) beneath the panels and used that to guide screw placement. While they eyeballed alignment thanks to experience, a DIYer would likely need to snap chalk lines to keep screws straight.
Cutting and Trimming Panels
Where necessary, panels were cut using a DeWalt tool, which made quick and clean cuts. The cut edges were later hidden under trim, creating a seamless look. One small hiccup was missed framing under some windows, which delayed flashing installation. Fortunately, the crew had the materials and quickly corrected it.
A product called “bird stop” or foam closure strips was added to prevent birds or debris from entering under the panels. These were custom-sized, unlike the limited size options from retail chains.
Drip Stop and Seam Details
One standout feature was the use of drip stop, a water-absorbing underlayment that prevents condensation from dripping inside. This replaces older solutions like bubble foil wrap and provides better protection.
Each panel was 18 feet long, made in one piece to minimize seams. They were installed with 2-inch black-coated screws that had built-in gaskets to ensure a weather-tight seal.
The first sheet was especially crucial—it had to be perfectly aligned, or all others would follow poorly. The standing seam design features an overlapping “leg” that locks into the previous panel. Misaligning this is a common beginner mistake.
Flashing, Final Trim, and Finishing Touches
Once both sides were sheeted, the crew installed the ridge cap and added foam closure strips to seal it from moisture and pests. Trim was installed along all leading and side edges, including the fascia, which protects the building from wind and water.
The project also featured clean detailing around the porch rafters, which the homeowner planned to paint white for a classic farmhouse style. The roof color matched existing house gutters and trim for visual harmony.
Final Cost and Time Breakdown
- Metal + Trim Materials: $3,100
- Labor (5 workers, 4 hours): $1,800 (includes tip)
- Total Cost: $4,900
Types of Standing Seam Metal Roofing Panels
Standing seam metal roofing is widely recognized and heavily used for all types of buildings due to its appearance, durability, and long-term value. However, once you’ve decided to go with standing seam, the next most important step is choosing the right type of panel that suits you and your needs.
There are three primary types of standing seam roof panels:
- Snap Lock with clips and concealed fasteners
- Mechanically Seamed with clips and concealed fasteners
- Nail Strip (also called Nail Flange or Fastener Flange)
Each system varies in terms of panel profile, seam height, fastening method, engineering requirements, and installation techniques. Below is a breakdown of each system to help you make the best choice.
1. Snap Lock Standing Seam Panels
Snap lock systems feature panels with a male and female leg that snap together without the need for special seaming tools. These panels are attached to the roof deck using concealed clips, meaning the fasteners are hidden and protected from the elements. This protection eliminates the need for rubber sealing washers, which can degrade over time due to expansion and contraction.
Advantages:
- Faster and less expensive installation (no mechanical seaming tools required)
- Highly popular in the industry and widely specified
- Engineered for various deck types and assemblies
- Great balance of performance, cost, and ease of installation
2. Mechanically Seamed Panels
This panel system uses clips to fasten the panels, which are then locked together using a mechanical or hand seamer. There are two types of mechanical seams:
- Single Lock – seam folded once
- Double Lock – seam folded twice
Double lock systems are more secure and offer the highest level of weather tightness, making them ideal for very low slope roofs or harsh weather environments. In contrast, single lock systems are easier to install and better suited for mild climates.
Advantages:
- Most secure and weather-tight option
- Essential for low slope roofs or areas with heavy snow or wind
- Preferred for commercial and extreme weather applications
Considerations:
- Most expensive due to labor and tooling requirements
- Requires experienced professionals and correct clip types based on roof engineering
3. Nail Strip Panels
Nail strip panels are a type of snap lock system that does not use clips. Instead, the male flange has pre-spaced one-inch slots that are fastened directly to the roof deck. After fastening, the female leg snaps over to hide the screws.
While this design simplifies installation, it can lead to issues. If fasteners are over-tightened, the panel’s ability to move (essential for thermal expansion) is compromised. This can cause stress on slotted holes and potential panel failure, especially if the metal around the fastener rips.
Advantages:
- Least expensive standing seam system
- Easiest to install, suitable for DIY projects
- Commonly used for residential roofing
Considerations:
- Lowest performance of the three panel types
- Not recommended for commercial projects
- Panel length limit of 30 feet
- Weather-tight warranties typically not available
4. Batten Panel System
Batten panel systems are one of the oldest and most traditional standing seam-style roofing systems. The system usually has two separate components: the first component is flat panels, and the second is a metal cap that covers the seams. These panels are installed with a raised edge on the roof, and the cap is placed over the raised seams, giving the appearance that two panels are joined together. They are a great option for areas with heavy wear and tear.
Installation Process:
- Panels are placed with raised edges (legs).
- A batten cap or cover snaps or locks over the seams.
- Fasteners are hidden beneath the cap, offering complete concealment and protection.
Advantages:
- Excellent for historic or architectural projects with a traditional appearance
- Strong visual definition due to the pronounced seam cap
- Good water resistance when installed properly
- Concealed fasteners protect against leaks and UV damage
Considerations:
- Requires more components and is slower to install
- Slightly bulkier appearance compared to modern snap lock panels
- Not as common in residential roofing but great for churches, institutions, or restoration projects
5. Nail Strip Panel System
Next, one of the most widely used panel systems is the nail strip panel system. These are a modern and simplified variant of standing seam metal roofing panels. These panels come with pre-punched slots and a metal leg, which allows them to be directly fastened to the metal roof without any clips. The female leg then snaps over the fasteners, hiding them from view.
Installation Process:
- Panel is fastened directly through slotted holes in the flange
- Female leg snaps over the male, concealing the screws
- No need for clips or additional seaming tools
Advantages:
- Fastest and easiest installation method among standing seam types
- Ideal for DIY projects and small-scale residential work
- Lower cost due to reduced material and labor requirements
- Clean, modern appearance with hidden fasteners
Considerations:
- Expansion and contraction can be limited if screws are over-tightened
- Not suitable for very long panels (limited to around 30 feet)
- Lower performance compared to mechanically seamed or clip systems
- Not recommended for commercial use or low slope applications
- Less likely to qualify for weather-tight warranties
6. Fastener Flange Panel System
Fastener flange panels are often grouped with nail strip panels because they share many similarities. However, the fastener flange system typically has smaller, thinner legs and uses narrower slots or holes for fastening. Like nail strip panels, these fasten directly to the roof deck and hide screws with a snap-over leg.
Installation Process:
- Screw fasteners go through narrow flanges on the panel
- Female leg is then snapped over to cover fasteners
- Designed for quick installation without clips
Advantages:
- Very fast installation, ideal for residential homes and small roofs
- No need for clips, reducing costs and complexity
- Lightweight design allows easy handling and transport
Considerations:
- Less durable in extreme climates or high-stress applications
- Still subject to the same pinning issues as nail strip if screws are over-tightened
- Not suited for long runs or low-slope roofing
- Least expensive of standing seam systems but with reduced long-term performance
Which Panel Type Is Best for You?
- Snap Lock: Best all-around option balancing performance and cost. Ideal for roof slopes of at least 2:12 or 3:12 and faster installation.
- Mechanically Seamed: Best for low slope roofs, extreme weather, and where maximum protection is required. Choose double lock for top-tier performance.
- Nail Strip: Best for tight budgets, shorter panel lengths, and DIY installs. Recommended mainly for residential projects.
- Batten Panel: Best for classic aesthetics, historic buildings, and architectural detail. Strong, secure, but more time-consuming to install.
- Nail Strip: Best for budget-conscious homeowners, DIY projects, and fast installs on roofs with moderate slopes.
- Fastener Flange: Best for quick and easy installation, especially for short panels and residential projects that don’t need commercial-grade performance.
Choosing the right standing seam panel depends on your budget, roof design, climate, and installation resources. While all standing seam systems require careful installation, understanding these three panel types helps you make an informed decision for a long-lasting metal roof.
Standing Seam Metal Roof Vs Corrugated Metal Roofing
Thinking about putting a metal roof on your house but not sure what panels you’re going to use? The first step is choosing your fastening system. There are two types: concealed and exposed. Today, we’re going to compare these two systems to determine which is best in categories such as cost, ease of installation, weather tightness, and more.
This guide is part of the Metal Roofing Learning Channel, brought to you by Western States Metal Roofing, where you can find a wide variety of panel colors and finishes—all while saving 15 to 50 percent on your materials by buying factory direct. Visit westernstatesmetalroofing.com to find the right material for your project. You’ll also find a downloadable guide with all the information discussed today in the description below.
Introduction to Metal Roof Fastening Systems
Hi, I’m Lauren—welcome back to our channel, or welcome if you’re new here. Today we’re discussing one of the most important decisions when selecting metal panels: your fastening system. Helping me explain everything is Paul Rubio, Vice President of Western States Metal Roofing.
Fastening System Overview
This is a critical decision for homeowners, as it directly affects the performance of your roof.
When considering an exposed fastener system like corrugated or R panels, the panels are held down with thousands of screws that penetrate the panel and go into the substrate. This creates potential leak points due to under- or over-tightened screws.
In contrast, a standing seam panel uses clips that sit on top of the panel, and the fasteners do not penetrate the panel itself. The next panel snaps into place, eliminating screw holes and significantly reducing leak risks. Additionally, the standing seam design allows for expansion and contraction, preventing screws from backing out over time.
If you’re in a harsh climate, the standing seam system is even more advantageous because of its superior leak resistance.
Pro Tip: If you opt for an exposed fastener panel, make sure to use a high-quality synthetic underlayment like Sharkskin. This adds an essential extra layer of protection.
Weather Tightness Winner: Standing Seam
When it comes to weather tightness, the clear winner is the standing seam system due to its concealed fasteners and ability to handle expansion and contraction.
Installation Comparison
There are significant installation differences between the two panel systems.
- Exposed fastener panels are typically 36 inches wide, allowing for faster coverage.
- Standing seam panels are 12 to 18 inches wide, meaning twice as many panels need to be installed.
Trim installation is also much more complex with standing seam systems. For example, a ridge cap on an exposed system is a single piece, whereas standing seam systems require three pieces of trim (a ridge cap and two Zs).
As a result, installation costs are much higher for standing seam panels.
DIY Note: Exposed fastener systems are suitable for handy DIYers with proper guidance. Standing seam systems, however, are not recommended for DIY installations due to complexity.
Installation Winner: Exposed Fastener
Thanks to simpler installation and lower labor demands, the exposed fastener panel is the clear winner here.
Cost Comparison
When considering metal roofing, cost is always a major factor.
- Standing seam panels generally cost $8 to $14 per square foot installed.
- Exposed fastener panels cost about $5 to $8 per square foot installed.
Why the Price Difference?
- Installation is more time-consuming for standing seam.
- Trim requirements are 2–3 times more on a standing seam roof.
- Materials are higher-end on standing seam systems:
- 24-gauge steel
- Kynar paint systems
- Concealed fasteners
These features make standing seam a lifetime roof designed to last 40 to 60+ years.
Corrugated panels, on the other hand, offer more options in terms of gauge (20–29) and paint systems, making them a more affordable option for a wide range of projects.
Cost Winner: Exposed Fastener
In terms of initial investment, the exposed fastener panel is significantly cheaper.
Maintenance Comparison
Standing Seam Maintenance
- Very low maintenance
- Just keep it debris-free and inspect periodically
- Truly a “set-it-and-forget-it” solution
Corrugated Maintenance
- Also needs to be debris-free
- Regular inspections are essential, especially to check for loose or broken fasteners due to expansion/contraction.
Maintenance Winner: Standing Seam
With its fewer exposed parts, standing seam wins the maintenance category.
Roof Slope Consideration
Your roof’s slope affects which panel type you should choose.
- Slope of 3:12 or greater: Either panel is fine.
- Slope between 1:12 and 3:12: Use a mechanically seamed standing seam panel for better weather resistance due to its double-lock lap system.
Slope Winner: Standing Seam
For low-slope roofs, standing seam is the superior choice.
Panel Strength
Panel strength depends on both material thickness and installation surface.
- On standard plywood substrates, both panel types are appropriate.
- When spanning supports like purlins (e.g., on a backyard canopy), exposed fastener panels offer greater span strength.
Panel Strength Winner: Exposed Fastener
Exposed fastener panels are stronger in structural spans without solid decking.
Aesthetics
Aesthetic appeal is subjective, but standing seam panels are generally viewed as:
- Modern
- Sleek
- Offering more color options
Note: Oil canning (a waviness in the flat areas of metal panels) can occur with standing seam panels. This is not a concern with exposed fastener panels.
Aesthetic Winner: Standing Seam
Standing seam panels win due to their modern look and color versatility.
Solar Panels & Snow Retention
Solar Panel Installation
- Standing seam: Solar panels can be attached via clamps, requiring no roof penetration.
- Corrugated: Requires penetration of the panels, creating potential leak points.
Snow Retention Systems
- Standing seam: Clamps attach without penetration.
- Corrugated: Requires holes in the panel, increasing the chance of leaks.
Snow & Solar Winner: Standing Seam
For energy efficiency and weather durability, standing seam is the clear choice.
Final Summary
Each panel system has unique advantages, depending on your needs and budget.
Exposed Fastener is Best When:
- You want the most economical panel
- You’re installing it yourself
- It’s a small project or canopy
- You’re spanning from support to support
Standing Seam is Best When:
- You have a larger budget
- You want the best roofing system
- You want minimal maintenance
- Your roof slope is less than 3:12
Pros and Cons of Standing Seam Metal Roofing
| Pros | Cons |
|---|---|
| Exceptional DurabilityWithstands harsh weather, resists cracking, rusting, and shrinking. | Higher Initial CostMore expensive than traditional roofing options. |
| Sleek, Modern AppearanceClean vertical lines offer a smooth, modern aesthetic. | Complex InstallationRequires skilled labor and specialized tools. |
| Hidden FastenersImproves waterproofing and reduces risk of rust or failure. | Oil CanningVisible waviness in panels may affect visual appeal. |
| Low MaintenanceDurable materials and design reduce upkeep needs. | Expansion & ContractionMetal movement can cause damage or noise if poorly installed. |
| Energy EfficiencyReflects solar heat, lowering cooling costs. | Noise Without Proper InsulationCan be loud in rain or hail unless insulated. |
| Long LifespanLasts 40–70 years with proper installation. | Shorter life span 20-30 years max |